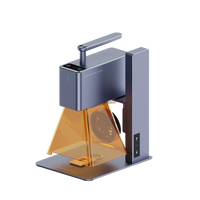
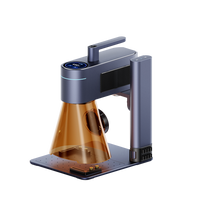
Plastic engraving stands as a versatile and essential technique in various industries and personal projects. Its significance lies in the ability to create precise and detailed markings, designs, or labels on plastic surfaces, enhancing their functionality, aesthetics, and informational value.
This blog aims to provide a comprehensive guide on how to engrave plastic, covering various engraving methods, tools needed, techniques, and tips for successful engraving.

In this article:
Part 1: How to Laser Engrave Plastic?
I. Types of Plastic Use
Plastics come in various types, each with its unique properties and applications for engraving:
- Acrylic (PMMA):Often chosen for its transparency, durability, and ease of engraving, acrylic is popular for signage, decorative items, and displays.
- ABS (Acrylonitrile Butadiene Styrene):Known for its impact resistance and versatility, ABS is commonly used in automotive parts, electronic housings, and consumer goods.
- Polycarbonate:With its high impact strength and heat resistance, polycarbonate is ideal for safety equipment, machine guards, and durable product enclosures.
- PVC (Polyvinyl Chloride):Recognized for its durability and chemical resistance, PVC finds applications in plumbing, construction, and signage.
- HDPE (High-Density Polyethylene):Featuring high strength-to-density ratio, HDPE is suitable for outdoor signage, cutting boards, and industrial applications.
II. Can I Laser Engrave Plastic?
Yes, laser engraving is a highly effective method for engraving various types of plastic. It employs a focused laser beam to precisely etch or mark the plastic surface, creating detailed designs, texts, or patterns. Laser engraving provides exceptional accuracy and versatility, making it a preferred choice for engraving plastics in many industries and personal projects.
III. What Plastics Can Be Laser Engraved?
Plastics that can be laser engraved include:
- Acrylic:Known for producing high-quality laser engravings due to its clarity and easy etching properties.
- ABS:Suitable for laser engraving, especially for creating detailed designs.
- Polycarbonate: Laser engraving works well on polycarbonate due to its durability and resistance to high temperatures.
- PVC: Engravable with lasers, offering precise and clean markings.
IV. What Plastics Cannot Be Laser Engraved?
While many plastics can be laser engraved, some plastics are not suitable due to their composition. Plastics that generally cannot be laser engraved include:
- Polypropylene (PP): This plastic tends to melt and produce poor-quality engravings due to its low melting point.
- Polyethylene (PE): Similar to PP, it melts easily and does not engrave well with lasers.
- Teflon (PTFE): Extremely resistant to heat and chemicals, making it unsuitable for laser engraving.
V. How to Laser Engrave Plastic? Step-by-Step Guide
- Prepare the Design: Create or select the design to be engraved using graphic software, ensuring it's compatible with the engraving machine.
- Material Selection: Choose the appropriate plastic material for engraving based on the desired outcome and the specific engraving machine's compatibility.
- Machine Setup: Set up the laser engraving machine, adjusting settings such as speed, power, and resolution according to the plastic type and design requirements.
- Secure the Material: Securely fix the plastic material onto the engraving platform using clamps or adhesives, ensuring it remains stable during the process.
- Test Run: Perform a test engraving on a scrap piece of the same plastic to confirm the settings and make any necessary adjustments.
- Start Engraving:Initiate the engraving process, allowing the laser to etch the design onto the plastic surface. Monitor the process for precision and quality.
- Post-Engraving Inspection: After completion, examine the engraved plastic for any imperfections or incomplete engravings.
- Clean and Finish: Remove any residue or debris from the engraved surface using appropriate cleaning methods, like wiping with a soft cloth or using a mild solvent if necessary.
VI. Tips for Successful Laser Engraving Plastic
- Ensure proper ventilation in the workspace to manage fumes or odors emitted during engraving.
- Use high-quality vector designs for sharper and more precise engravings.
- Experiment with different laser settings to find the optimal parameters for different plastic types.
- Regularly maintain and clean the laser engraving machine for consistent performance.
Part 2: How to Engrave Plastic with A Dremel?
I. Can I Engrave Plastic at Home?
Yes, plastic engraving can be accomplished at home with the right tools and techniques. There are various methods available for home use, including handheld rotary tools like Dremel, which offer precision and versatility for engraving plastic surfaces. With proper safety precautions and the right approach, you can achieve quality engravings on plastic within the comfort of your home workshop.
II. How to Engrave Plastic by Hand with a Dremel? Step-by-Step Guide
- Prepare the Design: Create or select the design to be engraved on the plastic surface. Transfer the design onto the plastic using a stencil or by directly drawing on the surface.
- Select the Engraving Bit: Choose an appropriate engraving bit for your Dremel tool. Diamond-tipped or carbide bits work well for plastic due to their precision and durability.
- Secure the Plastic: Clamp or fix the plastic securely onto a stable work surface to prevent movement during the engraving process.
- Safety Gear: Wear safety goggles and a dust mask to protect your eyes and lungs from plastic particles and debris generated during engraving.
- Adjust Dremel Settings: Set the Dremel tool to the desired speed based on the plastic type and the intricacy of the design. Lower speeds provide more control for detailed engravings.
- Begin Engraving: Hold the Dremel tool like a pencil and start engraving along the traced design lines with gentle, consistent pressure. Maintain a steady hand for precise lines.
- Control Movement and Depth: Control the depth of the engraving by adjusting the pressure applied and the speed of the Dremel. Take your time and work gradually to achieve the desired depth without damaging the plastic.
- Clean as You Go: Periodically stop and clean away debris and dust from the engraved lines using a soft brush or cloth to maintain visibility and precision.
- Inspect and Refine: Once the engraving is complete, inspect the work for any areas that may need refinement or touch-ups. Use finer engraving bits for delicate details or corrections if necessary.
- Final Touches: Wipe the engraved plastic surface with a damp cloth to remove any remaining dust or particles, revealing the finished engraved design.
III. Tips for Successful Engraving Plastic with a Dremel
- Experiment on scrap plastic pieces to familiarize yourself with the Dremel tool's speed and control before working on your final project.
- Use light, consistent pressure to avoid melting or warping the plastic and maintain control over the engraving depth.
- Start with simpler designs before attempting more intricate patterns to build confidence and skill.
- Regularly clean the engraving bit to prevent clogging and maintain its effectiveness during the process.
Part 3: How to Engrave Plastic with Cricut Maker?
I. What Plastics Can Be Engraved with Cricut Maker?
Cricut Maker is a versatile cutting and crafting machine that can engrave on various plastic materials. Plastics that can be engraved with Cricut Maker include:
- Acrylic:Cricut Maker can effectively engrave on acrylic sheets, providing detailed and precise designs due to its compatibility with the machine's engraving tools.
- Acetate: Thin acetate sheets can be engraved with the Cricut Maker, allowing for delicate and intricate designs.
- PETG (Polyethylene Terephthalate Glycol): PETG plastics, often used in 3D printing, can be engraved using the appropriate settings and tools on the Cricut Maker.
II. What Plastics Cannot Be Engraved with Cricut Maker?
While Cricut Maker is versatile, certain plastics might not be suitable for engraving due to their composition or properties. Plastics that may not work well with Cricut Maker for engraving include:
- Polypropylene (PP):PP tends to melt or warp easily under heat, making it unsuitable for engraving with the Cricut Maker.
- Polyethylene (PE): Similar to PP, PE can melt or deform when subjected to heat, making it challenging to achieve precise engravings.
- PTFE (Teflon): PTFE has high resistance to heat and chemicals, making it difficult to engrave with the Cricut Maker's tools.
III. How to Engrave Plastic with Cricut Maker? Step-by-Step Guide
- Design Preparation: Create or select the design you wish to engrave using design software compatible with Cricut Maker. Adjust the size and format to fit the plastic surface.
- Select the Correct Engraving Tool: Choose the appropriate engraving tool compatible with Cricut Maker for plastic engraving. Ensure the tool is properly installed and secured in the machine.
- Material Setup: Place the plastic sheet onto the Cricut cutting mat and secure it firmly to prevent movement during engraving. Ensure the material size matches the design dimensions.
- Load the Design: Load the design into the Cricut Maker software, following the instructions for the specific design and material.
- Adjust Settings: Set the engraving speed, pressure, and depth based on the type of plastic being engraved. Follow the recommended settings provided by Cricut Maker for the specific material.
- Engraving Process:Initiate the engraving process on the Cricut Maker, allowing the machine to engrave the design onto the plastic surface. Monitor the process for precision and quality.
- Inspect the Engraving: After completion, carefully remove the engraved plastic from the cutting mat. Inspect the engraving for quality and clarity, ensuring the design meets your expectations.
- Clean the Engraved Surface: Use a soft cloth or brush to remove any debris or residue from the engraved plastic surface, revealing the finished design.
IV. Tips for Successful Engraving Plastic with Cricut Maker
- Always perform a test engraving on a small section or scrap piece of the same plastic material to ensure the settings and design work well before starting the main project.
- Ensure the plastic surface is clean and free from dust or debris before loading it onto the cutting mat to prevent imperfections in the engraving.
- Use masking tape or adhesive sheets on the plastic surface before engraving to minimize potential marks or residue and protect the material.
- Regularly check and maintain the Cricut Maker's engraving tools for optimal performance and longevity.
FAQs About Plastic Engraving
- What is plastic engraving, and what are its uses?
Plastic engraving involves etching or marking plastic surfaces to create designs, texts, or patterns. Its uses span various industries, including signage, branding, personalization, industrial labeling, and artistic applications.
- Can all plastics be engraved using the same method?
No, different plastics may require specific engraving methods. While some plastics respond well to laser engraving, others might be better suited for rotary engraving or CNC machining.
- Can I engrave plastics at home using DIY methods?
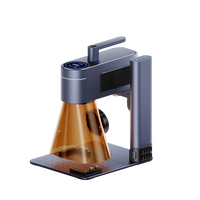
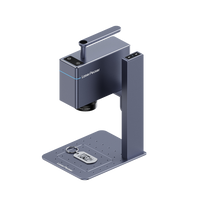
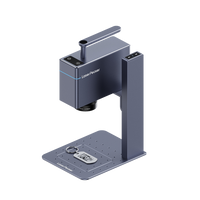
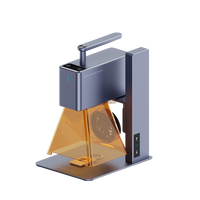
Yes, with the right tools and safety measures, it's possible to engrave plastics at home using mini laser engraver like LaserPecker, handheld rotary tools like Dremel or craft machines like Cricut Maker, providing opportunities for personal projects.
Conclusion
In conclusion, mastering the art of plastic engraving offers a world of creative possibilities and functional applications. Understanding the diverse array of engraving methods, suitable plastic types, and essential techniques empowers enthusiasts and professionals alike to create intricate designs, detailed markings, and personalized products.
Whether using advanced machinery like lasers or opting for DIY methods with handheld tools, the key lies in practice, experimentation, and a commitment to safety. As plastic engraving continues to evolve, its versatility remains unparalleled, promising endless opportunities for innovation, craftsmanship, and customization in various industries and personal projects.


